
オープンソースの圧縮・解凍ツール「7-Zip」。
Windows用のソフトウェアとして有名ですが、実はmacOSやLinuxにも対応していて、コマンドラインツールを公式サイトからダウンロードすることができます。
GUIは利用できませんが、ターミナルか充実したmacOSやLinuxならば特に困ることはないかもしれません。
以下macOSやLinuxで7-Zipを使用する方法を説明します。
7-ZipのmacOS/Linux版のインストール方法
7-ZipのmacOS/Linux版は公式サイトからダウンロードできます。記事執筆時、最新安定版は 7-Zip 23.01となっています。

例えばmacOSの場合は7z2301-mac.tar.xzをダウンロードし、中に含まれる7zzをパスが通ったディレクトリにコピーします(/usr/local/binなど)。macOSの場合、セキュリティ機能のためそのままでは実行できないかもしれません。その場合は右クリックから「開く」を実行します(初回のみ)。
macOSの場合パッケージ管理ツールを使ってインストールすることもできます。
MacPortsの場合:
sudo port install 7zip
Homebrewの場合:
brew install sevenzip
なお公式版が公開される前に利用p7zipはフォーク版で元になったバージョンが古く、現在はメンテナンスされていない模様です。どうせならば公式版を使った方が良いと思います。
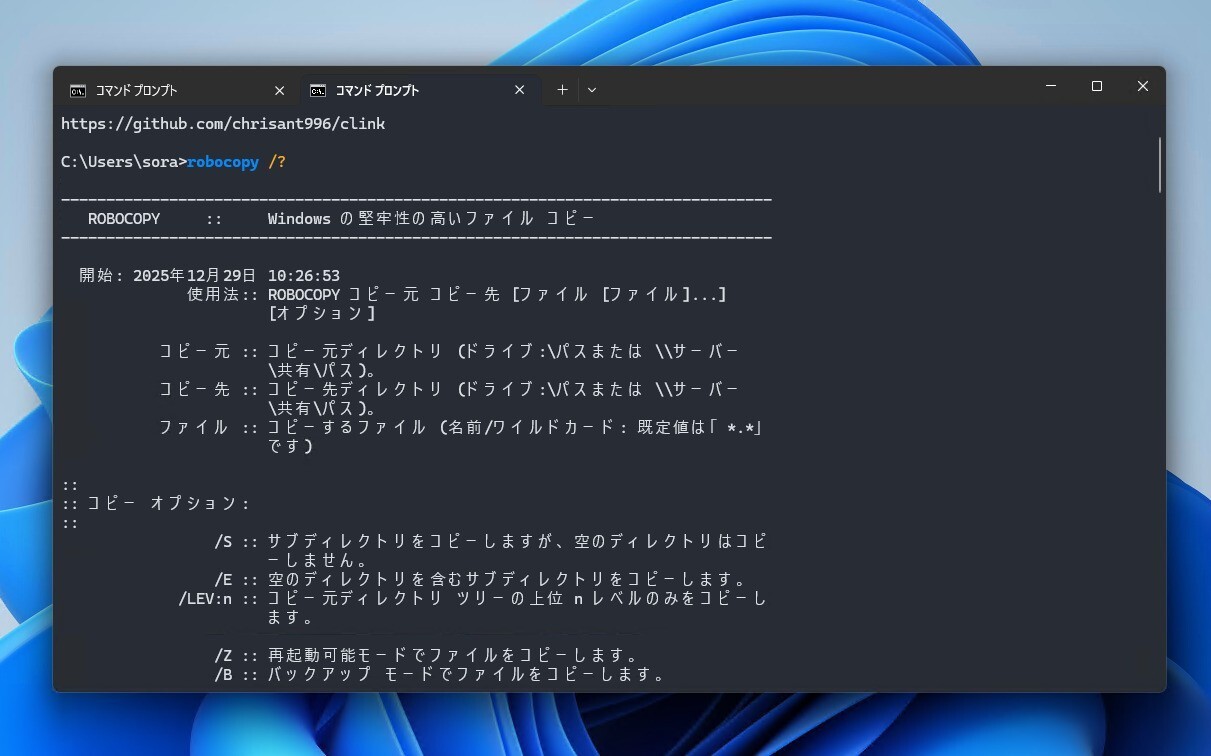
7zzコマンドの使用方法
7-Zipの公式CLIツールは7zzという名前で、以下の形式で実行します。
7zz コマンド スイッチ アーカイブファイル名、ファイルorフォルダ
aやxなどのコマンドで動作を制御し、スイッチで細かな設定を変更します。
使用例
指定したディレクトリに含まれるファイルを圧縮(aコマンドを使用):
7zz a backup.7z mydir
指定したアーカイブファイルを解凍(xコマンドを使用):
7zz x backup.7z
コア数を指定したい場合-mmtオプションを指定します。全てのコアが使われると負荷が高くなりすぎる場合、-mmt1を指定すれば良いかもしれません。
7zz a -mmt1 backup.7z mydir
そのまま実行するとオプションが表示されます。
Usage: 7zz <command> [<switches>...] <archive_name> [<file_names>...] [@listfile]

<Commands>
  a : Add files to archive
  b : Benchmark
  d : Delete files from archive
  e : Extract files from archive (without using directory names)
  h : Calculate hash values for files
  i : Show information about supported formats
  l : List contents of archive
  rn : Rename files in archive
  t : Test integrity of archive
  u : Update files to archive
  x : eXtract files with full paths

<Switches>
  -- : Stop switches and @listfile parsing
  -ai[r[-|0]]{@listfile|!wildcard} : Include archives
  -ax[r[-|0]]{@listfile|!wildcard} : eXclude archives
  -ao{a|s|t|u} : set Overwrite mode
  -an : disable archive_name field
  -bb[0-3] : set output log level
  -bd : disable progress indicator
  -bs{o|e|p}{0|1|2} : set output stream for output/error/progress line
  -bt : show execution time statistics
  -i[r[-|0]]{@listfile|!wildcard} : Include filenames
  -m{Parameters} : set compression Method
    -mmt[N] : set number of CPU threads
    -mx[N] : set compression level: -mx1 (fastest) ... -mx9 (ultra)
  -o{Directory} : set Output directory
  -p{Password} : set Password
  -r[-|0] : Recurse subdirectories for name search
  -sa{a|e|s} : set Archive name mode
  -scc{UTF-8|WIN|DOS} : set charset for console input/output
  -scs{UTF-8|UTF-16LE|UTF-16BE|WIN|DOS|{id}} : set charset for list files
  -scrc[CRC32|CRC64|SHA1|SHA256|*] : set hash function for x, e, h commands
  -sdel : delete files after compression
  -seml[.] : send archive by email
  -sfx[{name}] : Create SFX archive
  -si[{name}] : read data from stdin
  -slp : set Large Pages mode
  -slt : show technical information for l (List) command
  -snh : store hard links as links
  -snl : store symbolic links as links
  -sni : store NT security information
  -sns[-] : store NTFS alternate streams
  -so : write data to stdout
  -spd : disable wildcard matching for file names
  -spe : eliminate duplication of root folder for extract command
  -spf[2] : use fully qualified file paths
  -ssc[-] : set sensitive case mode
  -sse : stop archive creating, if it can't open some input file
  -ssp : do not change Last Access Time of source files while archiving
  -ssw : compress shared files
  -stl : set archive timestamp from the most recently modified file
  -stm{HexMask} : set CPU thread affinity mask (hexadecimal number)
  -stx{Type} : exclude archive type
  -t{Type} : Set type of archive
  -u[-][p#][q#][r#][x#][y#][z#][!newArchiveName] : Update options
  -v{Size}[b|k|m|g] : Create volumes
  -w[{path}] : assign Work directory. Empty path means a temporary directory
  -x[r[-|0]]{@listfile|!wildcard} : eXclude filenames
  -y : assume Yes on all queries
まとめ
macOSやLinuxで「7-Zip」のコマンドライン版を使用する方法を説明しました。これらのOSでメジャーなgzipやbzip2などの圧縮率・スピードに不満がある場合、試してみてはいかがでしょうか。
| タイトル | 7-Zip | |
|---|---|---|
| 公式サイト | http://www.7-zip.org/ | |
| ソフトアンテナ | https://softantenna.com/softwares/1357-7-zip | |
| 説明 | 高圧縮率を誇る7z形式をサポートしたアーカイバ。 |